GTCS Game Engine:
UI Tutorial
Note: These UI Objects are implemented in the updated game engine.
Introduction
This tutorial will cover the new UI Objects added. It will explain how to set up and use each of the UI Objects.
UI Objects: UI Text • UI Button • UI HealthBar • UI TextBox • UI Radio • UI DropDown
Source Code: You can download the source code from here.
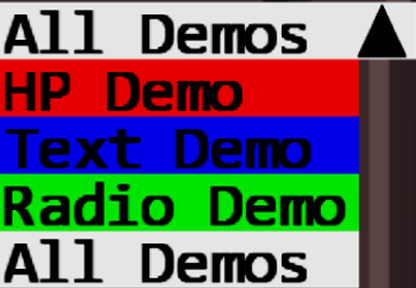
Demo: You can try the demo for the RigidShape Physics here.
Common Variables
There are variables that multiple objects use. Let's go over them.
| position | A 2 entry array that takes the PIXEL position of the object. |
| color | Whether it be the color of a box or text, this is a 4 entry array that controls the color of said part of the obejct. |
| text | A string for the object to display. |
| textSize | A single number that controls the height of text. This value also sets the height for some UI Objects. |
| callback | For Objects that do something when they are either clicked or have a value entered, this variable is the function that is called. |
| context | Who the callback function belongs to. For example, if the function you wish to call is this.setToRed(), then setToRed is the callback and this is the context. |
| aCamera | Used to convert pixel to WC and vice versa. Especially useful when auto positioning for the lists. |
Now that the common variables have been explained, let's look at the objects themselves.
UI Text

MyGame.prototype.initialize = function(){
	this.UIText = new UIText(text, position, size, hAlign, vAlign, color);
};
Size for this objects is the same as textSize for other objects.
hAlign sets which part of the text the horizontal position applies to. 0 sets the left end to the position, 1 the center, and 2 the right end.
vAlign sets which part of the text the vertical position applies to. 0 sets the top to the position, 1 the center, and 2 the bottom.
A FontRenderable Object for UI Purposes, Alignment makes positioning far easier.
UI Button

MyGame.prototype.initialize = function(){
	this.UIButton = new UIButton(buttonSprite, callback, context, position, size, text, textSize, textColor, clickTextColor);
};
buttonSprite is the texture that's used for the button. The texture has 2 butttons, the top is the normal state, the bottom is the clicked state.
Size is a 2 entry array that sets the width and height of the button in PIXELS.
clickTextColor is the color the text will have while it's being clicked.
An UI Object that triggers the callback function when it is clicked and released.
UI HealthBar

MyGame.prototype.initialize = function(){
	this.UIHealthBar = new UIHealthBar(sprite, position, size, buffer);
};
Sprite is the texture that's used for the button. The texture has 2 images, the top is the background part, the bottom is the part used to represent the current HP.
Size is a 2 entry array that sets the width and height of the health bar in PIXELS.
Buffer is the size difference between the forground and the background of the health bar in PIXELS.
Use incCurrentHP(num) to change the current HP by that amount. There are also getters and setter for the Max and Current HP.
UI TextBox

MyGame.prototype.initialize = function(){
	this.UITextBox = new UITextBox(position, textSize, width, color, textColor, callback, context);
};
The only unique variable is width setting the width of the text box in World Coordinates.
When you press enter, it updates the latest entered value. This value can be accessed with the getEnteredValue function.
UI Radio List

MyGame.prototype.initialize = function(){
	this.UIRadio = new UIRadio(callback, context, position, text, textSize, textColor, aCamera);
	this.UIRadio.addToSet = function (callback, context, text, textColor, aCamera);
};
UI Radio creates one node with the constructor, you need the addToSet function to add more nodes to the Radio List.
UI DropDown List
MyGame.prototype.initialize = function(){
	this.UIDropDown = new UIDropDown(position,text,textSize,textColor,boxColor);
	this.UIDropDown.addToSet = function (text, textColor, boxColor, callback, context, aCamera);
};
The constructor only sets up the headButton. To add actual items to the list, you need to use the addToSet function.
Draw and Update
Like every other object, Draw and Update are necessary in order to use the object. Draw is the same as every other object, update is different.
MyGame.prototype.update = function(){
	this.UIButton.update();
	this.UIDropDown.update(Camera);
};
UITextBox, UIRadio, and UIDropDown all require a Camera object to convert the mouse position to WC for the update.
Conclusion
These UI Objects will allow for a proper UI experience without the hassle of creating everything from scratch. Now that you've finished this tutorial, you now have the knowledge to use these UI Objects.